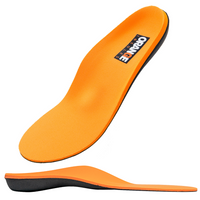
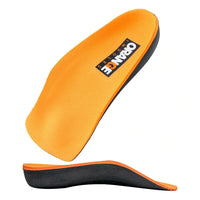

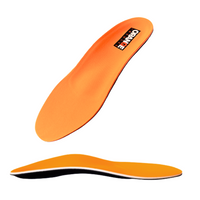

Blisters, arch cramps, and hot spots that show up at mile 18 are almost never random. They trace back to decisions you made (or skipped) about what was happening inside your shoes during the week before the race.
Check Your Insoles and Feet One Week Out
Most race prep checklists cover nutrition timing and pace targets. Almost none mention your insoles.
Pull the insoles out of your race shoes. If the heel cup is compressed flat or the arch feels soft under thumb pressure, your feet are running on a surface that has already lost its ability to manage impact. That matters more at mile 20 than mile 2. As your muscles fatigue, they rely on passive support from the shoe and insole to maintain your gait. When that support is gone, your foot compensates, and compensation creates friction in new places.
This is also the week to manage calluses. Thick callus ridges create their own pressure points under load. File them down to smooth, even skin. Trim toenails straight across, short enough that they will not hit the front of your shoe when your feet swell later in the race.
Run your final long effort in the exact shoe-sock-insole combination you will race in. No new gear on race day. If something feels off now, you still have time to fix it. If your insoles are past their useful life, keep in mind that athletic shoes break down faster than most runners realize, and the insole is usually the first component to go.
Key takeaway: Check your insoles for compression and your calluses for ridges one week out. These two things cause more late-race blisters than sock choice.
Race Morning: Layer Your Blister Prevention
You have a few hours before the gun. Use them to build protection for your skin..
Lubrication first. Apply an anti-chafe balm (petroleum jelly or a sport-specific product) to every known friction zone: between the toes, the ball of the foot, the back of the heel. If you have never blistered in a spot, skip it. If you have, do not.
Taping second. The Stanford Pre-TAPED study followed 128 ultramarathon runners and found that areas protected with paper tape had a 98% blister-free rate. Apply paper surgical tape directly to clean, dry skin over known hot spots before putting on your socks.
Socks third. Moisture-wicking, snug-fitting, no cotton. If you are blister-prone between the toes, toe socks eliminate skin-on-skin contact entirely. Whatever you choose, these should be the same socks you ran in during your last long effort.
Lacing last. If the top of your foot tends to go numb during long runs, loosen the laces across the midfoot. If your heel slips, add a heel lock lacing pattern. Your feet will swell one-half to one full size during a marathon, so leave enough room for that expansion without letting the shoe shift around.
Key takeaway: Layer your protection: lubricate, tape hot spots, then choose tested socks and lacing. Paper tape alone prevents 98% of blisters in taped areas.
First Half: Catch Hot Spots Early
The first 13 miles should feel unremarkable, but pay attention anyway. A faint warm spot at mile 4 is a hot spot forming. Thirty seconds at an aid station with a piece of tape or a sock adjustment can prevent a full blister that costs you minutes later. The math is simple: stopping briefly at mile 6 saves you limping for the last 10K.
Check your foot strike too. If you notice yourself landing differently than usual, something is already shifting. Tight calves can push you forward onto the ball of your foot, increasing friction across the metatarsals (the bones behind your toes). A quick calf stretch at a water stop takes seconds.
If you are not sure whether what you are feeling is normal race fatigue or something that needs attention, knowing how foot fatigue and foot pain feel different helps you make better mid-race decisions.
Key takeaway: The first half is your early warning window. A hot spot caught at mile 6 costs 30 seconds to fix. A blister at mile 20 costs minutes.
Second Half: When Fatigue Changes Your Gait
After mile 13, foot problems compound. Your lower leg muscles have been absorbing impact for over an hour. They are less responsive. Your foot begins to flatten more with each stride as the intrinsic muscles (the small muscles inside the foot) fatigue, which is why arch cramping tends to hit in the back half of a race.
As your arch drops, your gait shifts. Areas of your foot that had minimal contact with the shoe during training suddenly bear more load. That new contact creates new friction. This is how runners get blisters in places they have never had them before. It is not the sock. It is the gait change.
A firm, supportive insole resists this collapse. The deep heel cup keeps your heel centered and your arch loaded more evenly, which means fewer compensatory movements and less new friction. This is the stage of the race where insoles built for athletic use earn their value.
If cramping does start, slow your pace slightly, dorsiflex your foot (pull your toes up toward your shin), and press your thumb into the arch if you can reach it at an aid station. Electrolyte intake helps, but cramping after mile 18 is often biomechanical. The muscles are overworked because they are compensating for lost support underneath.
Key takeaway: Late-race blisters appear in new places because your gait shifts under fatigue. A firm insole with a deep heel cup reduces that shift.
Post-Race: What Your Feet Need in 48 Hours
Get your race shoes off within the first hour and switch to loose, open footwear. Elevate your feet above your heart for 15 to 20 minutes to reduce swelling. If you have blisters, leave them intact. The fluid underneath protects the new skin forming below. Clean the area, cover with a bandage, and let it heal.
Over the next 48 hours, gentle movement helps more than total rest. Short, easy walks in supportive shoes keep blood flowing without re-stressing tissue. Ice or cool water soaks for 10 to 15 minutes at a time to bring down inflammation.
This is also when it is worth inspecting your insoles again. If they held their structure through 26.2 miles, keep them. If they compressed flat, that tells you they were already past their prime before the race started. A post-run recovery routine that includes insole inspection keeps you from carrying hidden problems into your next training cycle.
Key takeaway: Leave blisters intact, elevate early, and check your insoles post-race. If they flattened during the race, they were already worn before you started.
Don't Forget to Check Your Insoles
Every runner obsesses over shoes, socks, and nutrition. Almost no one pulls out their insoles and checks whether the support directly under their foot is still doing its job.
Compressed insoles mean your feet work harder with every step. Over a 5-mile run, you might not notice. Over 26.2 miles, that extra work shows up as blisters, cramping, and pain that did not exist in training.
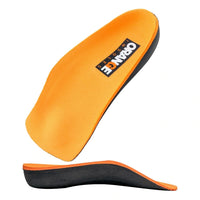
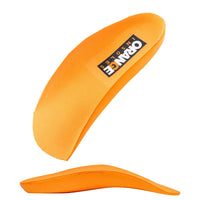
Orange Sport insoles feature a slim, athletic design with firm arch support. If your race prep covers everything above the insole, it is time to check what is underneath.
About the Author
The Orange Insoles team writes about foot health, performance, and pain prevention for runners, workers, and everyday active people. Orange Insoles has been helping people feel better and do more since 2014, with insoles designed to provide medical-grade support at an accessible price.