

Most thru-hikers spend months dialing in their gear list, food resupply strategy, and navigation plan. Feet get a few sentences: "buy good socks, tape hot spots." Then somewhere around week two, when their shoes feel a half-size too small and the arch support has gone flat, they realize foot care was never a checklist item. It was a system they never built.
Your feet change on a long hike. They swell, arches flatten under sustained load, and factory insoles compress to almost nothing after a few hundred miles. A static list of blister tips does not account for any of that. What works at mile 10 will not work at mile 500.
This guide breaks hiking foot care into five phases that match the reality of a multi-day or thru-hike: preparation before the trail, your daily on-trail routine, how to respond when problems show up, recovery at camp, and what to do on town days.
Before the Trail: Conditioning and Gear Selection
The best thing you can do for your feet happens weeks before you touch dirt. Foot conditioning is as important as cardio conditioning, and it is just as easy to skip.
Start with progressive load-bearing walks. Build from 5-mile days to 12-15 mile days over 6-8 weeks, using the pack weight you plan to carry. Your feet need time to adapt to sustained impact. If stretches that target your plantar fascia are not part of your routine yet, add them now. A few minutes of calf and arch stretches each morning builds resilience you will rely on later.
Shoe fit matters more than shoe brand. Try on trail runners or boots in the afternoon when your feet are slightly swollen, and size up at least a half size from your street shoes. Your feet will swell further on the trail, and a tight toe box is where toenail problems and blisters start.
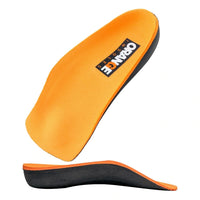
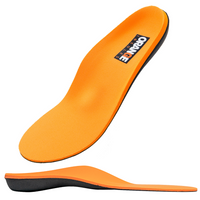
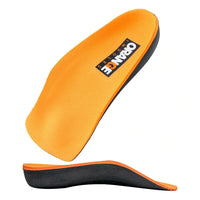
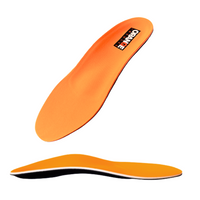
Pack replacement insoles. Factory insoles are built to a price point, not a mileage rating. Most compress noticeably within 150-200 miles, and on a thru-hike, that is barely getting started. A supportive insole with a deep heel cup holds your foot in alignment and resists the kind of gradual compression that flat foam cannot.
Key takeaway: Condition your feet for weeks before the hike, size your shoes for swelling, and carry replacement insoles from day one.
Daily Trail Routine: The 20 Minutes That Prevent Problems
On-trail foot care is not a single task. It is a short routine repeated at every break and at the end of every day.
At every rest stop (2-3 minutes): Take your shoes off. Let your feet air out. Moisture is the enemy. Wet skin blisters faster, softens more easily, and invites fungal problems. If your socks are damp, swap to a dry pair and clip the wet ones to the outside of your pack to dry.
Merino wool or synthetic liner socks are worth the investment. Cotton holds moisture against your skin. A thin liner sock under a cushioned outer sock reduces friction and wicks sweat away from the surface. For sock selection guidance, the 5 Best Socks for Hiking breakdown covers what to look for.
Hot spot protocol: The moment you feel a warm spot or irritation, stop. Do not hike through it. Apply Leukotape or moleskin directly to the skin before a blister forms. A hot spot treated in two minutes stays a hot spot. A hot spot ignored for two hours becomes a blister that costs you days.
Lacing adjustments matter. A heel-lock lacing technique prevents your foot from sliding forward on descents, which is where most toenail bruising happens. If your feet swell during the day (they will), loosen the forefoot lace zone but keep the ankle snug.
Key takeaway: Air out your feet at every stop, address hot spots immediately, and adjust your lacing as your feet swell through the day.
When Problems Show Up: Responding Before It Gets Worse
Even with a solid routine, problems happen on long treks. The key is recognizing what you are dealing with and responding early.
Blisters: If one forms, clean it and drain it with a sterilized needle at the base, leaving the skin intact as a natural bandage. Cover with a hydrocolloid blister pad, then tape over it. Change the dressing daily.
Foot swelling: Your feet can grow a half to a full shoe size over the course of a thru-hike. This is normal. The sustained pounding and increased blood flow cause both temporary daily swelling and longer-term structural changes. If your shoes start feeling tight across the forefoot by week two or three, you may need to size up at your next town stop rather than pushing through.
Arch and heel pain: When factory insoles go flat, your arch loses its support structure, and the plantar fascia takes on load it was not designed to carry alone. This is where understanding the difference between foot fatigue and actual pain helps. Persistent arch or heel pain after rest is a signal to replace your insoles, not just tape over the symptom.
Toenail issues: Black toenails come from repeated impact against the front of the shoe. Trim nails short and straight before the hike, and keep them trimmed on trail. If a nail is painfully bruised and pressure is building underneath, a sterilized needle through the nail can relieve it. This is a common trail procedure, but if you are unsure, wait for a town stop and visit a clinic.
Key takeaway: Drain blisters early, replace insoles when arch support fades, and size up shoes if swelling makes the fit too tight.
Camp Recovery: What to Do When You Stop Walking
Recovery at camp is where your feet prepare for the next day. Skip this, and the small problems from today become the big problems of tomorrow.
Elevate your feet for 15-20 minutes when you reach camp. Prop them up on your pack or a log, above the level of your heart. This reduces swelling and helps fluid drain from your lower legs.
Cold water therapy works. If you are camped near a stream, soak your feet for 5-10 minutes. Cold water reduces inflammation and feels better than almost anything after a 20-mile day. Dry thoroughly afterward.
Inspect everything. Check between your toes for early signs of maceration (when skin stays too white and soft from moisture). Check your soles for hot spots you might have missed. Check your insoles for compression. If they are noticeably thinner or no longer have a defined arch shape, they are due for replacement. Carrying a second pair of insoles and rotating them extends the life of both sets.
Sleep in clean, dry socks. Never sleep in the socks you hiked in. Giving your feet eight hours in dry fabric overnight is one of the simplest recovery tools available, and it helps prevent trench foot on wet-weather sections.
Key takeaway: Elevate, soak, inspect, and sleep in dry socks. Camp recovery is when your feet reset for the next day.
Town Days: The Reset That Keeps You Going
Town days are not just for food and showers. They are your best opportunity for foot maintenance that is hard to do on trail.
Assess your shoes and insoles honestly. After 200-300 miles, your shoes have lost significant cushion and your insoles may be completely flat. Many thru-hikers mail replacement shoes and insoles to resupply points along the trail. If you did not plan for this, most trail towns have outfitters, and quality insoles for hiking boots can be shipped to general delivery at a post office.
Treat your feet to a full reset. Soak them, trim your nails, file down calluses that are cracking or catching on socks, and moisturize. Calluses are protective up to a point, but thick, dry calluses crack and create entry points for blisters.
Walk around town in sandals or camp shoes. Let your feet spread, breathe, and recover in something that is not pressing on the same pressure points your trail shoes hit every day. If your recovery routine between high-activity days has been consistent, town days will feel like a reset rather than emergency triage.
Key takeaway: Use town days to replace worn insoles and shoes, do detailed foot maintenance, and let your feet recover in open footwear.
Your Feet Are the Gear That Cannot Be Replaced
You can swap out a worn backpack, mail yourself new shoes, or replace a broken trekking pole at the next town. You cannot replace your feet. Every other piece of gear protects something. Foot care protects the one thing that carries everything else.
The difference between hikers who finish and hikers who do not often comes down to whether they treated foot care as an afterthought or as a system. Build the system before you start, run it every day on trail, and your feet will carry you to the terminus.
Keep Your Feet in the Game
If your factory insoles have already gone flat or you are planning a long trek and want arch support that holds up over hundreds of miles, find the right insole for your feet and your trail. Your feet will thank you at mile 500.