

Six miles into a loaded pack day, your arches start to burn. By mile eight, every downhill step sends a jolt through your heels and up into your knees. You paid good money for those boots, so why do your feet feel like they're falling apart?
The answer is usually right under your feet. Most hiking boots ship with a thin, flat foam insole that costs the manufacturer less than a dollar. It's a placeholder, not support. Swapping it for an aftermarket insole designed for trail conditions can change how your feet handle distance, terrain, and load. But not all insoles work the same way on the trail, and picking the wrong one can create new problems.
Here's what actually matters when you're choosing hiking boot insoles, and why some features are worth paying attention to before your next trip.
Why Stock Insoles Fall Short on the Trail
The insole that came with your hiking boot is usually a flat piece of EVA foam (ethylene-vinyl acetate, the same squishy material in flip-flops). It cushions the first few miles fine. But it doesn't contour to your arch, doesn't cup your heel, and starts compressing permanently after a handful of hikes.
On flat pavement, that's manageable. On a rocky trail with a 25-pound pack, it's a different story. Without arch support, your foot flattens under load. Without heel stabilization, your foot slides laterally on uneven ground. The boot's rigid outer shell does its job protecting your ankle, but inside that shell, your foot is working overtime to stabilize itself.
That extra effort is what creates the fatigue, hot spots, and soreness that build through a long day. The boot isn't the problem. The insole is.
Key takeaway: Stock insoles are flat foam placeholders. On the trail, your foot needs contouring and structure that factory insoles aren't designed to provide.
Deep Heel Cup: The Feature That Matters Most on Uneven Terrain
A deep heel cup is a raised wall around your heel that keeps it centered over the base of the insole. On flat ground, it's a comfort feature. On a rocky trail, it's a stability feature.
When your foot lands on an angled surface, your heel wants to roll to the low side. A flat insole lets that happen freely, which forces your ankle muscles to catch the roll. Do that a few hundred times on a day hike, and you're dealing with ankle fatigue, lateral knee strain, and blisters from your foot shifting inside the boot.
A deep heel cup holds your heel in place so the correction happens at the insole, not at your ankle. It also keeps your foot's natural fat pad centered under the heel bone, which means better shock absorption on every step without relying on thick foam layers.
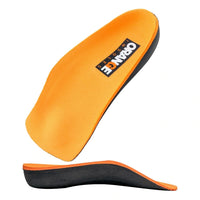
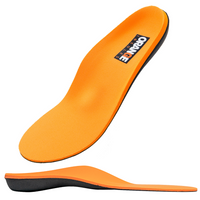
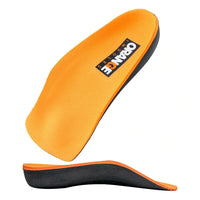
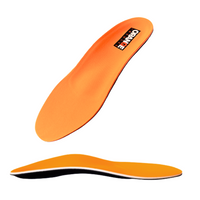
If you're comparing insoles, the heel cup depth is the single most important spec to check. Orange Insoles builds their signature deep heel cup into every model for exactly this reason.
Key takeaway: A deep heel cup prevents lateral roll on uneven ground and reduces ankle fatigue by stabilizing your heel mechanically, not just with cushion.
Arch Support: Flexibility Beats Height for Multi-Day Hikes
Arch support isn't one-size-fits-all, and higher isn't always better. What matters more on the trail is how the arch profile matches your foot and how the insole flexes under load.
A rigid, high-arch insole works well for someone with high arches on a short day hike. But on a multi-day backpacking trip, your feet swell, your arches drop slightly under sustained weight, and your gait changes as fatigue sets in. An insole that was perfect at the trailhead can feel like a pressure point by day two.
Look for an insole with semi-rigid arch support that provides structure without locking your foot into one position. The arch should guide your foot's natural motion, not fight it. If you already deal with plantar fasciitis, that balance between support and flexibility matters even more on long approaches.
For hikers who aren't sure what arch profile they need, Orange Insoles offers a guide to choosing the right insole based on your activity and foot type.
Key takeaway: Semi-rigid arch support adapts better to trail conditions than stiff, high-profile insoles, especially on multi-day trips where your feet change throughout the day.
Moisture Management: Keeping Feet Dry Prevents More Than Discomfort
Wet feet blister faster. That's the short version. The longer version is that moisture softens skin, increases friction inside the boot, and creates the conditions for hot spots that turn into full blisters within a few miles.
Stock insoles typically use closed-cell foam that traps heat and moisture against the bottom of your foot. A good hiking insole uses materials that wick moisture away from the skin surface or allow airflow between your foot and the insole. Some use antimicrobial top covers that reduce odor buildup on multi-day trips.
Pairing the right insole with moisture-wicking hiking socks gives you two layers of defense against blisters. The socks manage moisture from above, and the insole manages it from below. Neither one alone does the full job.
Key takeaway: Moisture-wicking insole materials reduce blister risk by keeping the foot-to-insole contact surface drier, especially on warm or multi-day hikes.
How Pack Weight Changes What You Need From an Insole
A day hiker carrying a water bottle and a sandwich puts very different demands on an insole than a backpacker hauling 35 to 40 pounds over a mountain pass. Pack weight amplifies every structural weakness in your footwear.
Under heavy load, your arch compresses more with each step, your heel strikes harder on descent, and your forefoot absorbs more impact on uneven surfaces. An insole that handles a light day hike comfortably can bottom out under a loaded pack, losing its cushioning and support when you need it most.
If you regularly hike with a heavier pack, you may want to consider an insole with a firmer base layer that resists compression under load. Some hikers prefer insoles that include a carbon fiber or nylon shank, which is a stiff support layer built into the insole. This design can help distribute pressure more evenly across the foot instead of concentrating it at the heel and ball of the foot. It follows the same principle that makes mountaineering boots stiffer than trail runners. While this type of construction can be beneficial in certain situations, it is not necessary for everyone and is often not the best starting point for most hikers.
For thru-hikers and backpackers covering serious mileage, long-distance foot care strategy matters just as much as insole selection. The insole is one piece of a larger system that includes boot fit, sock choice, and daily foot maintenance.
Key takeaway: Heavier loads need firmer insoles with compression-resistant materials. If your insole bottoms out under pack weight, it's not supporting you when it counts.
Getting the Fit Right: Volume, Trim, and Boot Compatibility
A hiking insole only works if it fits your boots properly. Most hiking boots are designed with removable factory insoles that can be replaced with a supportive aftermarket option. Replacing the original insole, rather than layering a new one on top, helps maintain the intended fit while providing better support and comfort.
Before purchasing, remove the factory insole and compare it with the replacement. A similar overall profile is often the easiest fit, but many supportive insoles are slightly thicker because they include additional cushioning and structural support. The most important factor is that the insole fits securely inside the boot without creating uncomfortable pressure points.
Many aftermarket insoles are sold as trim to fit, requiring you to cut them to match your boots. Orange Insoles are available in specific shoe sizes, so they are ready to use right out of the box with no trimming required. Simply select the correct size, remove your factory insoles, and install your Orange Insoles for a quick, hassle free upgrade.
After installing your insoles, wear your boots around the house for a short period to make sure your heel feels secure, your arch is well supported, and your toes have enough room to move naturally.
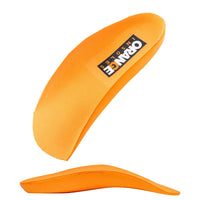
If your hiking boots already fit very snugly, or if they do not have a removable factory insole, you may want to consider a lower profile or 3/4 length insole. Otherwise, most hiking boots have plenty of room for a supportive replacement insole.
Key takeaway: Match insole thickness to your boot's available volume. A great insole in a boot that's too tight will cause more problems than it solves.
Find the Right Support for Your Trail
Your hiking boots handle the terrain. Your insoles handle your feet. When the support underneath your foot matches the demands of the trail, you hike farther with less fatigue, fewer hot spots, and better stability on every surface.
Orange Insoles are built around the features that matter most for hikers: a deep heel cup for stability on uneven ground, semi-rigid arch support that adapts to your foot under load, and materials that manage moisture mile after mile. Browse the full lineup to find the insole that fits your boots and your trail.